
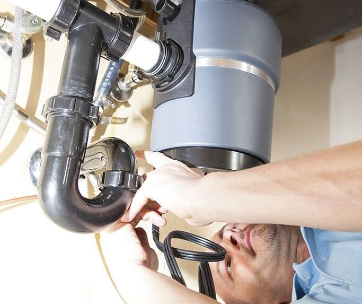
As one of the handiest devices in the household, the garbage disposal has provided homeowners with the ability to have a cleaner kitchen. The disposal unit offers the convenience of getting rid of unwanted food and waste by liquefying the food remnants for flushing down the drain.
However, despite being an essential appliance in every kitchen, many homeowners find installing garbage disposal quite the hassle. But this is further from the truth as you will soon find out it is pretty straightforward. It takes time, effort, and standard tools to install a garbage disposal. So rather than hire that garbage disposal installation service, read on and learn what it takes to install and make the job easier.
For beginners, learning how to install a garbage disposal where there was none can seem like a daunting task. You face several factors that could make or break the garbage disposal installation process. The kitchen sink design especially plays a significant role in how you get to install a garbage disposal.
As it stands, you can install a garbage disposal on either a single or double bowl sink. Of course, the single sink gives you less hassle than installing in the double bowl sink. All it takes is getting the proper garbage disposal and a couple of essential tools to get the job done.
Still, a double bowl sink installation should not have you sweating, the design will only be a challenge for the tie-down of the second sink. This means you can still have a DIY garbage disposal installation, whether a single sink or a double sink with the strainer basket. But like always, the first move is to get a garbage disposal that matches everything you need from the model to the horsepower you want. Once you line up the correct garbage disposal unit plus hand tools, then you are good to go.
What You'll Need
Aside from time and effort, here are a couple of more items you might need
- Screwdriver
- Wire nuts
- Plumber's Putty
- Hammer
- Utility Knife
- Adjustable Pliers
- Plastic putty knife
- Slip-joint pliers
- Wire strippers
- The Garbage disposal unit
- A Cleaning rag or cloth
- Electrical current tester
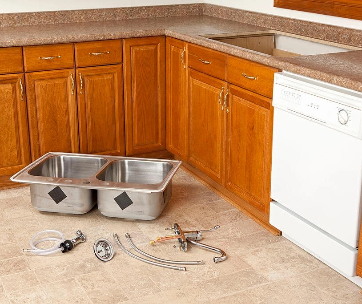
Once you gather all these items, it's wise to remove all pipes and any other things underneath the sink. Hold on to each item since they can come in handy during the installation process. If you are replacing, you will need a detailed layout of how the plumbing has been configured. That implies you need to remember how plumbing hooks up to the existing garbage disposal. We recommend you take a picture if your photographic memory fails when you assemble the garbage disposal unit.
Step by Step Guide on How to Install a garbage Disposal Unit In a Single Sink
Step 1
Clean underneath the sink of any plumbing material or items to create a decent work area
Step 2
Switch off the garbage disposal electrical wiring using the circuit breaker. Once you turn off the circuit breaker, confirm no electric voltage is present using the tester. This will help you know if you have shut off the circuit breaker correctly and that no electricity is present.
Step 3
With the slip-joint pliers, remove the couplers found in the underbelly of your sink. These couplers act as joints that attach the drain's extension pipe and the sink's P-trap. Place all the removed components somewhere safe.
Take note you should plug the drainage using the rag or cloth to prevent foul smell or kitchen waste spilling out through the pipes.
Step 4
Check the drain coupling section and undo the nut using the pliers. Once you have the nut loose enough, push it up to separate the drain flange from the rest of the lower sink parts. The flange removal will reveal plumber putty from pasts installation; be sure to scrape it off using the putty knife to create a clean work area.
Step 5
Add new putty around the flange and spread it around to fit everything back. Once is the putty is distributed, take the flange and fit it inside the sink's bottom hole. You can now place the backup ring plus the gasket in the flange's open sleeve underneath the sink.
Step 6
Take the mounting ring and fit it back on. With the screwdriver, firmly tighten all screws against the sink drain.
Step 7
If there is excess putty, wipe it off using the rag or cloth. The plumber knife might also come in handy for scraping off any hardened putty around the flange.
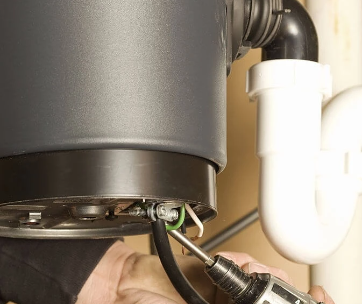
Step 8
Start working on the electrical by removing the garbage disposal's electrical compartment cover. Please take out the wall switch's electrical cable with the wiring open and stretch it out to six inches. Identify the wire clamp in the wiring compartment and attach the six-inch wall cable. Get the screwdriver to tighten all screws around the clamp region.
Step 9
Unsheathe the six-inch wall switch cable while it's inside the compartment. The wire strippers also come into play since you will use them to unsheathe another half an inch of insulation among the black and white wires. Use the utility knife to expose both cables in the wiring compartment.
Step 10
Identify the wire nuts and use them to link the disposal's wires to the respective wall switch wiring. For instance, get the wire nuts to attach the unit's cable wire to the corresponding wire on the wall switch. That means you secure the garbage disposal's white wire to the white cable wire while the black cable wire gets attached to the black disposal wire.
Step 11
Take the bare wire and wrap it around the green grounding screw inside the garbage disposal's wiring compartment. Tight the plain wire end while tucking all cables inside the wiring compartment and sealing it off.
Step 12
Place the garbage disposal unit inside the mounting ring and screw it in. Ensure the mounting ring firmly holds the garbage disposal and the unit's outlet links directly to the drainpipe.
Step 13
Take the disposal discharge tube and place it inside the unit's outlet. After taking the rag from inside the drainage before attaching the extension pipes and P-trap. With all the components in place, use the slip-joint pliers to tighten the plumbing couplers firmly.
Step 14
Check all the wiring is in place and not exposed across the plumbing components.
Step 15
Confirm every component is in place and switch back on the circuit breakers. Open the sink's faucet and turn on the garbage disposal to see if it works. If each appliance runs smoothly, the garbage disposal is ready for use.
Consider that the installation process is different and depends on the garbage disposal model. So, to be safe in the fitting process, consult your garbage disposal manual or a plumbing professional before any mounting takes place.
Step by Step Guide on How to Install a garbage Disposal Unit In a Double Sink
A double sink system helps with faster cleanups for homeowners with a busy kitchen while improving overall hygiene. However, the double kitchen sink can be improved by installing a garbage disposal to add to the dual functionality and convenience. The only difference is that each sink does not need to work with a separate P-trap, as you can have both drains going to a common trap under both sinks.
Here's the process if you are indeed looking to install a disposal unit for your double sink:
Step 1
Get the drain assembly fittings and install them at the open end of one sink. Meanwhile, the garbage disposal holder should go to the bottom end of the other sink. You may need to dismantle the sink and work on it away from the cabinet.
Step 2
Generously spread the plumber's putty throughout each hole before fitting in the components. Use the adjustable pliers to tighten any loose drain plugs.
Step 3
Install the sink back and ensure to tighten the cabinet clips using the screwdriver
Step 4
Get hold of the garbage disposal and affix it by mounting it through the holder. Check the product manufacturer's instructions on installing the disposal unit in place. However, most units are easy to install since they only need you to engage the holder and rotate it anticlockwise till it locks in place.
Step 5
Get the tailpiece end and connect it to the drain out on the sink with the drain assembly fittings.
Step 6
Connect the plastic compression nut and slide it into the tailpiece. Ensure the compression washer and the tee trap have a perpendicular outlet facing the disposal unit. Use your hand to tighten this compression nut till the tee is firmly in place to its tailpiece.
Step 7
You will need to cut a flanged PVC extension of equal length as the distance between the garbage disposal outlets and the tee bottom end. Slide the rubber disposal washer onto this PVC flanged pipe's back, then follow this up with the garbage disposal's mounting bracket. Once all these are in, slide in the compression nut and tee bottom connection washer for the final fixing.
Step 8
Connect your drain pipe onto the tee bottom end and affix it in place by tightening the compression nut. Push the flanged PVC extension pipe inside the garbage disposal end and secure it using the mounting brackets and screws in place.
Step 9
Apply plumber putty evenly through the tee bottom end and mount the P-trap assembly inside. Tighten the components together by screwing the compression nut using your hands.
Step 10
Check and confirm whether your drain comes with a P-trap adapter. If so, connect the trap after mounting it at the tee bottom end. Just be sure to tighten the compression nut before having the P-trap secured to the adapter.
Step 11
Wipe off any excess Plumber's Putty and switch on the circuit breaker.
CONCLUSION
As far as you can tell, how to install a garbage disposal is not a daunting task. While other plumbing jobs will need to get down and dirty, this is a DIY job for just about anyone. The best thing is you also get to save money from not hiring a garbage disposal installation service.
Still, you will always have to follow the advice of the garbage disposal installation kit to get the correct installation. It is a valuable guide with tips to make your garbage disposal easier. Most importantly, you get the ultimate satisfaction at a job well done from your effort.

Comments