

Garbage disposers are the true unsung heroes of the kitchen. You might not acknowledge them if you've never installed one, but once you start making use of your disposer, you'll wonder how you ever managed to live without it. Garbage disposals will gladly swallow up your leftovers and break down food to prevent your pipes from clogging, and they will never groan about what you feed them.
Sometimes you are too tired to reach under the sink and plug in the disposer every time you want to use it; luckily, you can simply wire a switch above the washstand that connects to the garbage disposer. Unfortunately, Wiring a disposer with no experience can be complex, and so it is dangerous if you've never worked with electrical components before.
Having said that, with the right tools and a little knowledge, it can be as easy as pounding up yesterday’s mashed potatoes. With these instructions, you'll have your disposer connected and running in no time. So, with some preparation and some free time, you’ll be on your way to living the good life – the disposer life.
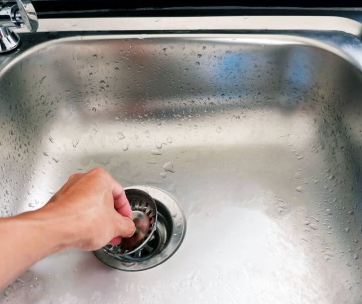
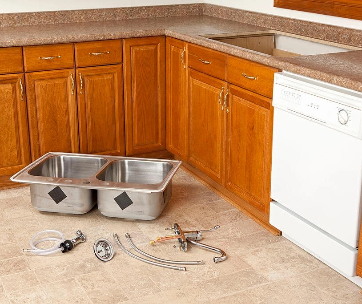
PS: Hook up the garbage disposer to your sink before Wiring
A Step by Step Guide on How to Wire a Garbage Disposal
PS: Hook up the garbage disposer to your sink before Wiring
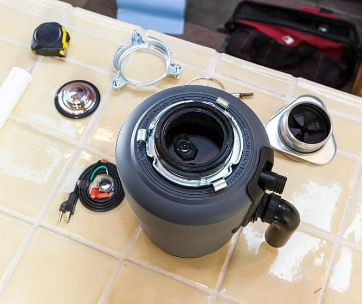
1. Remove the Wiring Compartment Cover
If your disposer didn’t come with a pre-installed power cord, locate it (it is usually below the disposal unit) and remove the metallic cover. On many disposers, you'll find the compartment to be secured using one screw. Unscrew the cap, open it up and keep the pieces aside (you'll need it afterward)
2. Place the Cable Clamp
Install the cable clamp into the hole beside the wiring compartment. Insert the intertwined end of the clamp in the hole and seal it on the inside of the disposer's base with a clamps nut. You will then reach through the compartment to intertwine and screw the nut onto the clamp. You may need to pat on the lugs of the nut using a flat head screwdriver to screw it up.
NB: some garbage disposals are designed to screw the cord clamp directly into the unit, so this step will differ according to the model you have.
3. Strip the Wiring on the Cord (as needed)
Use a wire stripper to remove about ¾ of the insulation from the end of all three insulated wires. Pay attention and confirm if the cord wiring is stranded copper or solid copper. For stranded copper, use the stranded notches; for solid copper, use solid notches.
NB: stranded copper is a bit larger than the solid copper of the same nominal size; necessary, you don't use identical notches on the wire stripper.
:To minimize the risk of an electrical short or even fire, do not strip off more than ½ inch (equivalent to 1.3 cm) of insulation.
4. Connect the Cord
Take the end of the Cord that you just stripped and feed it through the cable clamp and into the wiring compartment. Seal the Cord by tightening the screws onto the clamp. Do not tighten it too much; the Cord shouldn't be compressed or damaged.
5. Connect the Wires
Focus on the two black wires of the power cord; you will see that one of the two black wires is ribbed. Take the ribbed wire and connect it to the white wire from the disposer. For the remaining black wire, connect it to the black and yellow from the disposer.
Look inside the wiring compartment for a green screw; connect the ground wire to this screw. Secure the connection with the two nuts provided and do not tighten them too much.
NB: some garbage disposers are designed differently, and the hot wire might be red instead of black. If that's the case, connect the red wire lead to the black wire in the appliance cord. Some cords may not be colored; if so, the lead with ridges on the outer edge is the white or neutral wire, the middle wire substitutes the ground wire, and the wire that doesn’t have ridges is the hot wire.
6. Replace the cover to the wiring compartment
Carefully slip in the wires inside the wiring compartment. Hopefully, you still have the screw from the beginning of the job. Reinstall the cover and seal it with its screw.
After successfully installing the disposer and the plumbing connections, insert the plug into a switch and test how the disposer operates by flipping the switch while water is still running through the sink. Now your disposer is wired and ready.
3 vital tips to keep in mind when wiring your garbage disposer.
Wiring a disposer is all about installing or replacing for it to work perfectly. The steps involved in Wiring a disposer do not necessarily require you to hire an electrician so long as you have knowledge on the project and keep these few tips in mind while you wire it up.
- As you wire your disposer, the first tip that might save your life and prevent a fire from starting is to turn off the breaker to the area where the garbage disposal is. If you are unsure where the proper fuse is situated, turn on the switch that the wires are connected to and turn off the fuse.
Once you find and turn off the fuse, confirm using a tester if the power is, in fact, off. Your safety comes first, so once the switch is off, tape the button up or the whole box if necessary, and mark it, so everyone in your house knows that the fuse needs to remain off because it's being worked on.
- When you wire your garbage disposer, ensure the positive wire is connected to the positive side. If there's an extra wire in place, it acts as a stable ground to prevent any chance of a fire occurring in the future, so ensure it is also correctly attached.
Most people tend to ignore this wire, but you should know that this wire is delicate, and the reset mechanism within the unit will not function if the wire isn't hooked up. A GFI plug is generally used for appliances like garbage disposers because it has a higher chance of getting wet.
- The final tip to keep in mind is when you wire a garbage disposer into an electrical outlet, the unit has to be a GFI unit. So, if a problem comes up, the switch can turn itself off instead of tripping the breaker for the whole house. Many disposers have a direct plug that you easily insert into the outlet, but if you're going to wire it directly, there are a few points to note.
First off, be sure that the positive and negative side is plugged to the same polarity in your house wiring, and never forget to cap the wires with a plastic covering designed for the task.
You don't need to cover the ends with electrical tape, but it's safer and minimizes the chance of sparks jumping out, which can prevent a fire from starting if the outlet box is damaged.
Frequently Asked Questions
a) What if I Don’t Have a Power Outlet Under the Sink?
It's not that hard to wire a garbage disposer, and we'd recommend you do it yourself to at least gain insight. However, a power socket is entirely different and easy with no experience. If you don't have a power outlet under the sink, we suggest hiring a licensed electrician. Trying to install it yourself can worsen.
b) Does a Garbage Disposer Need a Dedicated Circuit?
Although a garbage disposal's power outlet is situated close to the water, it's unnecessary to have GFCI protection. Still, we recommend having a dedicated circuit even if it isn't compulsory.
You can connect your disposer to the same power outlet you use for your dishwasher. If a dedicated circuit is mandatory, it will be stated in the instruction manual.
Conclusion
Welcome to the world of garbage disposal living. Wiring your garbage disposal might sound overwhelming or scary, but the process is simple, and with the help of our guide, you'll be a pro in no time enjoying your new best friend in the kitchen. Your safety comes first when wiring your garbage disposer, so ensure your hands and fingers are clear of the opening.
Our guide has you covered if all you want to do is wire your disposer to a plug connected to the wall outlet and switch it on and off. If you want to hardwire into the electrical system at your house, we would suggest you get a licensed electrician.
We hope the information we've provided will be helpful to you and your home improvement project. For more tips and knowledge on maintaining and achieving functional kitchens, do not hesitate to reach us or read through our other articles.

Comments