
Every day, you depend on your garbage disposer to get rid of the food scraps in the kitchen. And even though your disposer does a perfect job of getting rid of the leftovers, after many years of service, it might troubleshoot, meaning it's time to repair or replace the disposer.
Deciding whether to repair the disposal yourself or call in for assistance will solely depend on the problem. If you're still uncertain on how you are suppose to repair or replace the garbage disposal, our guide will advise you on the best course of action to take.
Consider the Problem First
To determine the best course of action to take, you first need to figure out the issue. In many cases, the symptoms will indicate where the problem is, and you'll know where to attack first. Let's dive into some of the problems and how you'll repair them:
1. Your disposer won’t turn on
Confirm if the disposer is plugged in the socket; if it doesn't work, you can try resetting it and check if the circuit breaker and the wiring are okay. If your machine won't turn on even after these trials, it is most likely damaged beyond repair. The average cost for replacing a disposer can range from $150 - $950, depending on the purchased unit and labor cost.
2. It leaks often
Wondering why you often find puddles of water near your garbage disposer? The unit might have cracks, which is common for regularly used disposers, but that doesn't necessarily mean you have to replace the disposal. To be certain if this is the case, check if all the mounting bolts are placed tightly. Tightening the bolts doesn’t require a professional; it's a simple and quick fix.
3. Garbage disposal is frequently clogged.
If your disposer clogs frequently, it can be caused by numerous reasons; for instance, throwing food scraps down the disposer that you shouldn't. It would help if you remembered that these machines don't like stringy foods like bananas and hard foods like fruit pits and bones.
Even so, if your disposer still clogs despite your best efforts, it could mean the blades are blunt, or your disposer is small considering the number of food scraps you want it to grind. If you suspect the dullness of the blades might be causing the clogging, you can try fixing it by throwing in a handful of ice, a cup of rock salt, and some lemon slices inside the disposer. Run the water down the drain and turn on the disposer until it stops grinding; if the trick doesn’t work, it might be time you replace your disposer.
Garbage disposers differ in size depending on the amount of horsepower. You can normally correspond the power in the motor to the number of persons in your homestead and those who use it. Here is a size guide you can use:
- 1/3 horsepower motor for 1-2 persons per house
- 1/2 to 3/4 horsepower motor for 3-6 persons per house
- 2 horsepower motor for more than 8 persons per house
N/B: Disposers with a 1 horsepower motor or higher are pricier than the less powerful units.
4. Your disposer is slow.
If your garbage disposer works but you feel like the operation is in slow motion, it might be caused by the motor when it begins to fail, or the blades are too blunt to grind as they usually do. You can fix it by attempting the ice, salt, and lemon trick we had mentioned earlier; if it doesn't help, we’d recommend you replace your disposal. Ensure there is always water running when you use the disposer.
5. Your disposer smells
Another indication that the motor and blades are failing is the bad smell coming from the disposer. If your disposer stinks, it could be a sign that food is not being chopped into small pieces as it should, and as a result, some get stuck, and eventually, it decomposes in the machine. We suggest you sharpen the blades (the tip we had shared earlier will help freshen the disposer, thanks to the lemon slices), but if your disposer still produces bad smells, it might be time you replaced your disposer.
6. Your disposer is very loud but doesn't mash foods.
If your disposer is noisy and vibrating but isn't grinding any food, it could be mean the motor isn't working, but the disposer is still receiving electrical power. Before you conclude on replacing, check to see if any solid or hard food scraps are stuck between the impeller and the shredder ring.
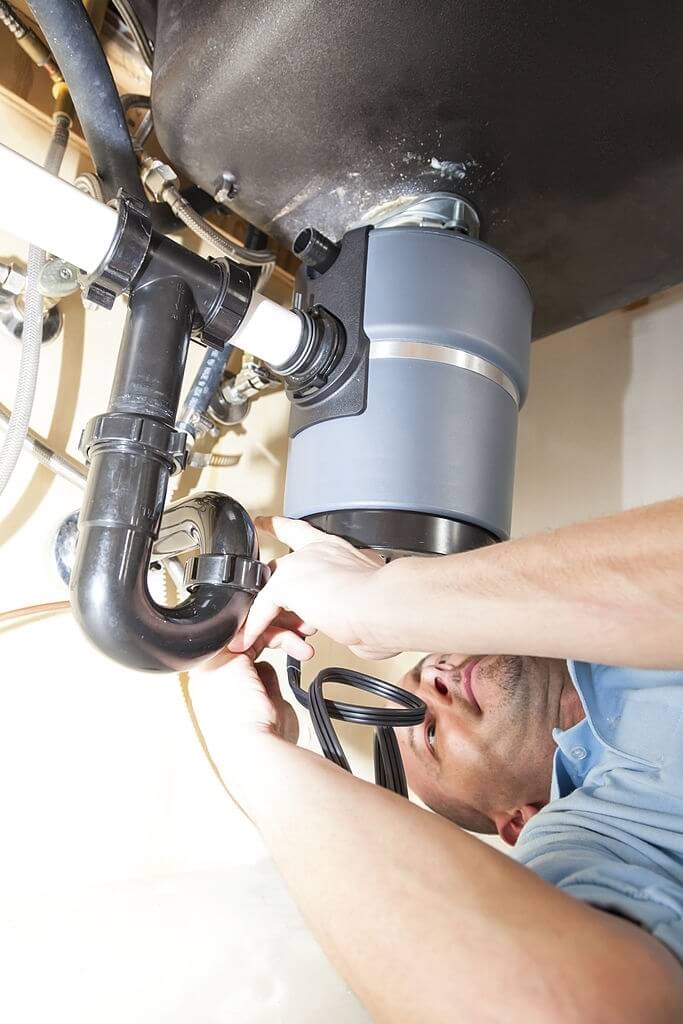
A Step and Step Guide on How To Repair a Garbage Disposal
After you have identified where exactly is the problem, let's take a look at some of the steps you can take in repairing a garbage disposer:
Step 1: Turn Off the Electricity
Start by switching off the electricity to the disposer at the service panel. Detach the cover from the foot of the disposal, unbolt the ground screw and disconnect both wire connectors.
Step 2: Loosen the Bolts
The next step will be to check the dishwasher discharge hose and slacken it a little bit to assist in pulling out the hose from its component. To unhook the drain crosspiece, slacken the bolts that hold together the drain flange to the garbage disposal.
Step 3: Remove the Outmoded Unit
Garbage disposers bolts to the sink drain fittings in numerous ways; some disposers use intertwined plastic nuts while other disposers use larger hose clamps. To detach the disposal, hold it up and rotate the large, 3-tab mounting ring located at the head anticlockwise till the unit departs. Take out the rest of the drain assembly by slackening the bolts and prying off the retaining ring. Push the drain out through the sinkhole and dispose of any putty.
Step 4: Apply Putty
When installing the new drain assembly, begin by rolling a pile of plumber's putty on the counter till you have a 1/2-in-thick, 10-in- long piece. Take the putty and stick it on all sides of the base of the drain and press the drain tightly into the sinkhole.
Step 5: Finish the Drain
Fishing the drain assembly will then require you to slip in the cardboard washer and the reserved ring for backup onto the drain spud.
Step 6: Snap the Ring
Follow with the mounting flange and the retaining ring then snap the retaining ring onto the drain spud
Step 7: Screw Up the Bolts
Screw up the bolts tightly using a slotted screwdriver till a great deal of the putty is squeezed out and the drain feels warm in the sink.
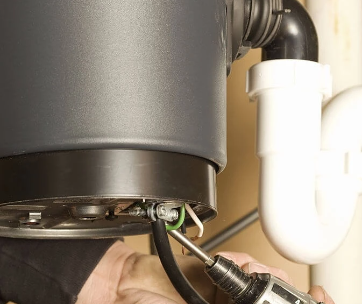
Step 8: Wire the Disposer
It is mostly easy to wire a new disposer before installation. If your old disposer was installed without a flexible conduit, it would be wise to upgrade it. Kick-off by threading the old box connector into the pedestal of the new.
Step 9: Finishing it Up
Take the circuit wires together with the conduit and insert them into the connector and secure the conduit. Unite the circuit wire that is coated black with the black lead in a single wire connector, and the white circuit wire with the white lead on the other. Tie up the ground wire below the green, ground screw and replace the cover.
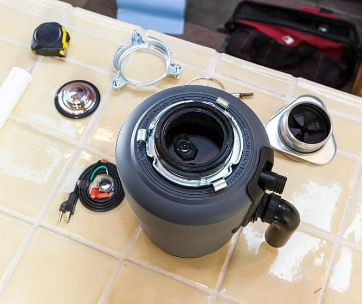
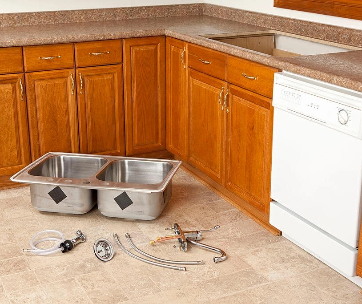
Installing the New Unit
Disposers in mint condition come together with a dishwasher discharge nipple set up, but it comes with the nipple plugged if you don't have a disposer. If you're intending to use the dishwasher fitting, poke on the plug out using a screwdriver and extend into the disposal to recover it.
Raise the disposal to the drain and attach the tabs of the mounting ring. When you have the mounting ring starting, slide a screwdriver in one of the tab slots and spin the ring to the right till it bottoms out.
When installing the drain outlet in the disposal, fit in the rubber washer on top of the flanged end of the plastic crosspiece, then slip the metallic flange on from the opposite end. Tip the base of the metallic flange into its spot inside the disposal ad screw up the fastening bolt through the head of the flange.
Cut the crosspiece to the right length, attach it to the drain tee and install the P trap.
Average Repair Costs
Many factors affect the cost of repairing garbage disposers:
- The extent of damage done on the disposer
- Age of the disposer
- How old is your home?
All these factors will influence how much you're going to spend on repairs. If there is excess damage following a leakage, you might be required to pay more for structural repairs or electrical work. The charges for repairing your disposer may be more than anticipated if your home is old and the wiring and plumbing are not within reach.
When to Replace Your Garbage Disposer
Sometimes, the best decision would be to replace your disposer. A leaking disposer, operating slowly, noisy, or other serious complications should be replaced altogether. The age of the disposer is also another factor worth considering. Many disposers can live up to 8 – 15 years, so if your disposer has exceeded the lifespan and is still troubleshooting even after repairing, you might consider replacing your older garbage disposal with a new one. A new disposer will range around $50 - $350.
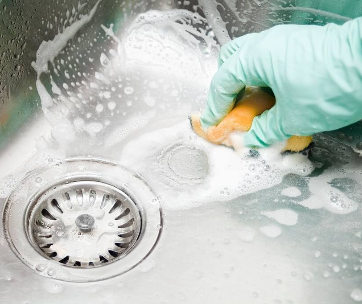
Basic Garbage Disposal Care
Your garbage disposer will work to its fullest potential if you follow these basic rules we've highlighted:
- It is recommended to use cold water when you grind food scraps (warm or hot water can melt fats and eventually clog the pipes)
- Do not grind more than the estimated amount of food wastes at a time.
- It would help if you did not pour bleach, drain cleaners, or any chemical into the disposer
- Do not grind excessive fibrous foods, bones, or coffee grounds (read from the manual) or such materials as glass or rubber
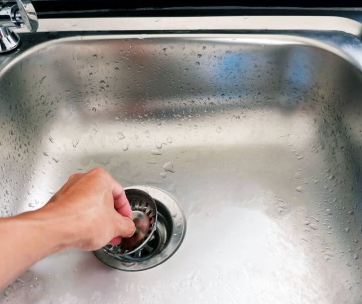
- Always run water before you use the disposer, and after, if you've thrown something that you shouldn't have, pull them out using tongs or pliers. Never use your hand.
- To clean up a disposer of built-up sludge and debris, you'll first need to fill it with ice cubes and a cup of rock salt and run it for around five seconds. If your disposer stinks, deodorize it by running warm water down the drain as you grind lemon slices.
Shopping For a Garbage Disposer
Replacing your disposer can be costly, or not, depending on the model you prefer. Many garbage disposals range between $45 to $250, and most operate smoothly under normal use. It's normal for a $50, 1/3 horsepower disposer with a 1-year warranty to live up to 10 years. So, what does an expensive disposer guarantee you?
- More powerful
- Long warranties
- Less aggravation
- Increased longevity
The quality disposers have stainless steel components, auto-reversing starts, and bigger motors. Disposers that reverse direction with every start helps in reducing stoppages, while the bigger motors can easily grind the more varied and larger food scraps.
Frequently Asked Questions
What is the best way to ensure your garbage disposal is always in good shape?
Be sure to turn on the water when the disposer is operating; this will maintain healthy garbage disposal and minimize the chances of clogging. In addition, be aware of the food scraps you feed the disposer as certain items will create problems for the garbage disposal. Some include; pasta, grease, bones, eggshells, tough or fibrous peels, etc. Avoid feeding your disposer such foods.
NB: Be mindful of what causes problems for your disposer. It will help in the long run.
Do I require a professional to fix my garbage disposer, or can I do it independently?
It is quite simple to repair your disposer at home, but it can be dangerous to fix certain parts without the experience and knowledge required. For instance: If your disposer is clogged, avoid reaching for the unit to remove the clog on your own as the blades might injure you. Instead, contact a professional technician to assist.
Conclusion
If your garbage disposer has stopped working and you've tried everything on our guide and are still unable to fix the issue, it would be recommendable to assign a professional to advise you whether to replace it or if the issue can be solved. Feel free to leave a comment at the comment section below.

Comments