

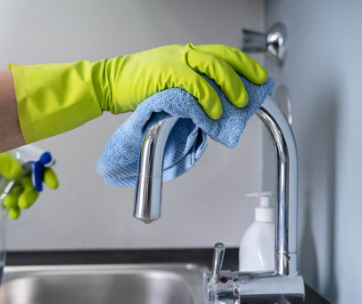
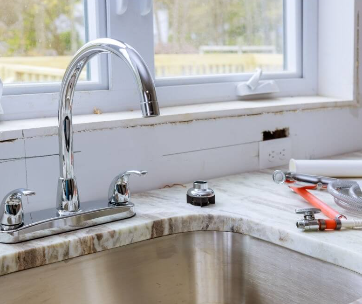
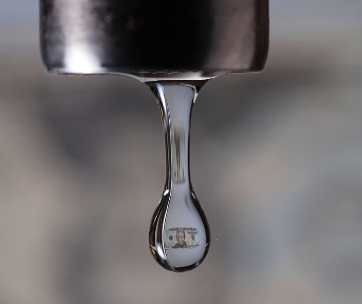
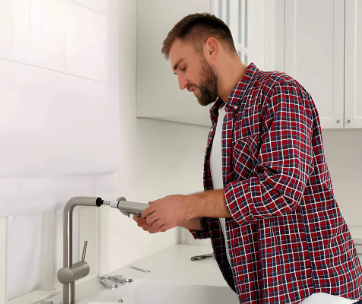
Does your kitchen faucet continuously drip? Do you struggle with wiping off a puddle that seems to be a permanent occurrence at the base of the faucet? The right diagnosis for both of the issues is that your kitchen faucet is leaky, and that is one of the most common plumbing problems homeowners have to deal with.
In this article, we will furnish you with a step-by-step process on how to repair a leaky kitchen faucet. We will also provide you with the types of faucet leaks and how to detect them.
Leakage in your kitchen is pretty annoying. Besides, you will most likely end up with a lot of water bills resulting from water wastage. Thus, these are DIY plumbing issues that you should move with speed to fix. While you can quickly repair a kitchen faucet in one hour, problems arise because there are various types of faucets available in homes, and each type has a unique repair mechanism.
You don't have to fret. We will make this kitchen faucet repair guide rather elaborate yet easy to follow.
How to Detect a Leakage in a Kitchen Faucet
Interestingly, kitchen faucets will often leak from two places;
1. A Leak from the Spout
Many kitchen faucets are often susceptible to dripping, and the spout is often the culprit. Spout leakages' primary characteristics are consistent drips that continue even after you turn the water flow off.
The continuous drips from the spout often result from a fault around the handle. You can temporarily control the leakage by twisting the handle into the right position or adjusting it to a tighter position for minor cases.
Of course, the onset of these drips is often passably occasional but will inevitably get worse over time. It could be a single drop in half an hour or more, but early detection is always vital.
The best way to detect a spout drip at early stages is to clean your sink dry and lay a dry paper cloth beneath the spout. You can also place an empty cup or a small container underneath the spout and come back after an hour or so. If the paper towel has moisture, your test will be positive. The same applies if you find water in the cup or container.
2. The Faucet Base
A leak at the faucet base is always a tricky one to detect, and you will probably find out when the damage is too much. The reason is that as you clean, rinse, or wash your hands, water splashes at the base of your faucet and pools on the countertop or sink deck.
Since these leakages often happen when water is running, dry the base and the entire deck, turn the faucet on, and stick an eye for any water seepage around the base.
Causes of Leaks in Kitchen Faucets
What causes faucet leaks?
You must answer this question correctly to repair a leaky kitchen faucet. While there are several reasons for this, we will minimize our discussion to four of the most common reasons.
They include;
Washer Wear
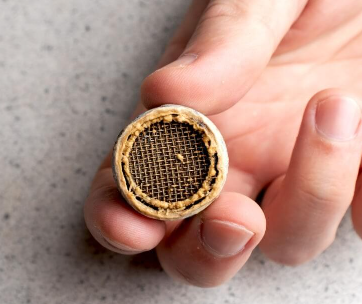
There is a reasonable amount of friction between the internal washers in faucets and the existing valve seats like every other moving part. The continuous friction leads to wear and tear, and as you continue using the faucet, the rubber valve wears off and loses its effectiveness. Water will then get past the valve, leading to a dripping tap.
O-Ring Issues
A stem screw secures most cartridge faucet handles. The screw often features a small disc known as an O-Ring. While the O-ring acts as a sealant, it loosens or becomes worn out with regular use. Such an action will result in a leak around the handle.
Corrosion
For compression faucets, corrosion around the valve seats is the leading cause of drips through the valve. The valve seat connects the water inlet mechanism to the faucet spout in compression types of faucets. This area is prone to mineral deposits and sediment and will always lead to corrosion.
Incorrect Installation
Sometimes kitchen faucets begin to leak as soon as the installation process is complete. Such are often instances of incorrect installation. Thus, ensure that you reinstall your tap correctly and correctly position and tighten all washers and seals.
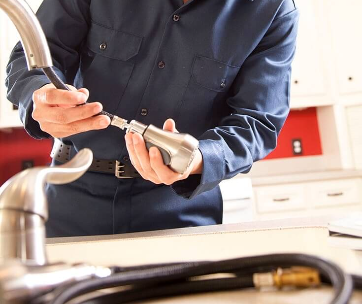
How to Repair a Kitchen Faucet
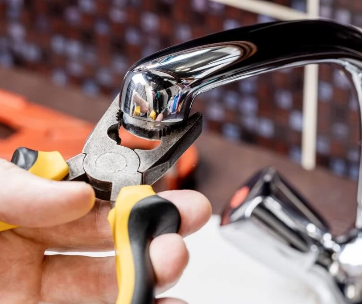
Fixing a leaky faucet is a simple DIY activity. However, you cannot successfully repair one if you do not understand the kitchen faucet's anatomy in question. We bet that you already understand that there are different types of kitchen faucets.
And since each type comes with unique anatomy, repairing them requires different procedures. Therefore, we will provide you with a step-by-step guide on repairing a leak in each type of faucet.
But before that, preparation for the repair process is a prerequisite for all the faucet types. The preparation procedure includes turning off the water from the taps in the plumbing pipes and preparing a towel on which you will put the removed components.
How to Fix a Leaky Ball Faucet
Ball-type faucets are common in many domestic kitchens and commercial enterprises. They feature a single handle that commands a special ball made from plastic or metal and is located within the system. Usually, The ball features an array of slots, spring-loaded rubber seals, and rubber O-rings.
Moving the single lever of the faucet also moves the ball to control the flow volume and water temperature. Since they do not have traditional washers, leakage is always due to worn-out rubber seals, weak springs, or a defective ball. Besides, when the rubber O-rings wear out, you may witness a leak at the base.
What You Need to Repair a Ball Faucet
- Allen wrench
- Four-point screwdriver
- Channel-lock pliers
- Utility knife
- A corresponding repair kit to your faucet model
- A new control ball
- Heatproof grease
Step-by-Step Guide on Repairing a Ball-Type Faucet
The following steps will help you repair a ball kitchen faucet;
- Turn Off the Water Supply to The Faucet- You can use the valves underneath your sink or the valve that controls the water supply to the entire home.
- Remove The Handle- Many faucets come with an Allen wrench in the repair kits that you can use to remove the handle. You can also use any wrench of the right size to do this. Removing the single lever handle by turning the screw counterclockwise exposes the top cap.
- Tighten The Collar- If the leakage is from the spout base, tightening the locking collar with a special spanner wrench does the trick. So, you can try out this, turn on the water valve, and test the system for any leakage. If the leak is no longer there, you can return the handle and stop at that. But if it continues, then the next steps should help.
- Take Out the Top Cap- You can remove the top cap by gripping it and turning it anticlockwise. Ensure that you do not dent it during the process by padding your channel-lock pliers appropriately. Removing the ball exposes the cam, and that's essential for the next step.
- Remove The Ball Components- The cam consists of a plastic piece with a lever that pokes through it. Take out the can, the washer, and all the ball components. Inspect the ball for wear or dents, and replace it as part of the repair process if you notice any damage. You can use a plastic or metal ball, depending on what you have at hand.
- Remove The Seals- In ball kitchen faucets, the seals are at the bottom of the body. Use a tiny flat-blade screwdriver to extract the rubber valve seals. You will also need to remove the springs from the same ports. As you do this, please note the springs' positioning, as this will come in handy when you reinstall them.
- Remove The Spout- With a little tug, lift and twist the spout to remove it. Once done, remove the O-ring at the base of the body using a screwdriver. You can also cut it using your utility knife without scratching the body of the faucet.
- Replace The O-Ring- Take a new O-ring and cover it with heatproof grease. Replace the old O-ring with a new one and ensure that you slide it until it settles on the groove. You can then replace the spout by pushing it over the O-Ring.
- Install The New Valve Seals- Replace the valves by fitting the springs into the rubber seals and dropping them in the port at the bottom of the faucet. Once done, ensure that they are correctly in place by adjusting them with the tip of your screwdriver.
- Install The New Ball- Install a new control ball and follow it up with the cam washer and then the cam. Ensure that the cam's alignment lug fits into the grove in the faucet. You can then replace the top cap and reattach the single lever. Secure the handle with the screw and tighten it with the Allen wrench.
- Turn on your water supply and test the system.
How to Repair a Leakey Ceramic Disc Faucet
A disc faucet features a lever over a cylindrical body. The single-handle disc faucet can move sideways or upwards/downwards to control water flow and temperature. These systems mix cold and hot water in a mixing chamber known as the pressure balance cartridge.
The chamber's ceramic discs reliably control water flow and temperature by moving downwards/upwards or sideways. During a leak, the culprits are the little rubber inlet seals that either fail or get clogged with water deposits.
What You Need to Repair Ceramic Disc Faucets
- Hex or Allen wrench
- Groove pliers or pipe wrench
- Utility knife
- A new disc cartridge
- Screwdriver
- Rubber seals
- An O-ring
- An old toothbrush
Step-by-Step Guide on Repairing Single-Handle Ceramic Disc Faucet
- Turn off the water supply to the faucet using the valves supplying the sink or the home's main valve.
- Remove the handle level by unfastening the screw using a screwdriver or an Allen wrench.
- You can then remove the ceramic disc cartridge by removing the screws that secure the cartridge. Lift the cartridge out once you loosen all the screws. Check the cartridge for any damages and replace it if you have to do so.
- Clean the rubber seal seats, the O-ring, and the seals using a soft nylon brush or an old toothbrush. You can check for mineral deposits at the base of the cartridge. Remove the O-ring, clean, coat with heatproof grease, and reinstall.
- Reassemble the disc cartridge and replace the cleaned rubber seals.
- Replace the handle and secure it tightly with the screws.
- Restore the water supply into your sink and test.
How to Repair a Leaky Cartridge Faucet
Cartridge faucets come with single or dual handles. In the case of dual handle options, each handle features a cartridge and a valve. The process of fixing a cartridge faucet is pretty much the same for both single and double-handle models. However, you will first need to determine the leaking side for dual models.
What You Need to Repair a Cartridge Faucet
- Pipe wrench
- Assorted screwdrivers
- Allen wrench
- Replacement cartridges
Step-by-Step Guide on Repairing a Cartridge Faucet
- Turn Off the Water Supply- You can use the valves underneath your sink or the valve that controls the water supply to the entire home.
- Remove the Faucet Handle- Check for screws on the rear or your faucet's sides and unscrew them to remove the handles. You can occasionally find the screws hidden under decorative caps or removable levers. Locate them and use an Allen wrench to remove them.
- Remove the Nut- Use a pipe wrench to loosen and remove the retaining nut. You will find a brass screw at the top whose function is to secure the cartridge shaft. You can easily remove it and use it with the replacement cartridge.
- Remove the Cartridge- Before you take off the cartridge, you will need to note its orientation lest you find trouble reinstalling it.
- Replace the Cartridge- If your cartridge has issues, you will need to replace it with a new one. Cover the O-rings with sufficient heatproof grease and slip the cartridge into the body.
- Reassemble the Remaining Components- Secure the cartridge with a new or the old retaining nut. Reinstall the other components such as the handle, the setscrew, and the decorative cap in that order.
- Turn on the shutoff valve and test the faucet.
How to Repair a Leaky Compression Faucet
Compression faucets are considerably old-school and are prevalent in older homes. They feature washers, compressed by the handle.
The washers control the flow of water. It is exciting to note that these models are cheaper to repair since a washer replacement often stops the leak.
What You Need to Repair a Compression Faucet
- Flat-blade screwdriver
- Channel-type pliers
- Philips screwdriver
- A faucet handle puller
- A stem washer
- Grease
- An O-ring
Step-by-Step Guide on How to Repair Compression Faucets
- Shut off the water supply to the faucet using the valves supplying the sink or the home's main valve.
- Remove the faucet handle by untightening the screw that holds it to the valve stem. You can use the compression handle puller to get it out if you encounter any problems extracting it.
- There is a cover that you might find over the valve stem assembly. Remove the cover and continue to take off the entire valve stem assembly by loosening the hex nut and unscrewing the entire assembly.
- Take out the stem washer by loosening the brass screw that holds it. Clean any mineral deposits from the valve seat and inspect the condition of the washer. If the washer is faulty, find a replacement washer and ensure that it sits perfectly on the valve seat.
- Coat the O-ring with enough waterproof plumber's grease and replace it.
- Reassemble the remaining components of the faucet, which include the handle, the screws, and decorative caps.
- Turn on your water supply and test the system.

Comments